Sunday, September 25, 2011

the yummiest flaky pastry dough (great for fruit pies!)

I want to share with you my favorite pie crust recipe. It's different than any recipe I see on cooking blogs, cook books, and it's different than the recipes people have given me. That's why I feel it is worth sharing! Most pie crust recipes contain shortening or lard, this recipe is ALL butter. 

Butter, though it has a bad rep, is truly a wonderful thing and in most circumstances it is the fat I choose to use. It's natural and pure.... and let me tell ya I LOVE the results. 

Before I get into this I have to tell that, no, I didn't make it up, it's from my Williams Sonoma Baking Book. It's untraditional. It's a bit thicker and it tastes different- it's so very yummy though. 

Some might think because it has sugar that it isn't good for savory pies and they would be wrong! I use this for my chicken pot pie and it's wonderful! So take a look and maybe someday you might want to try it! :)


Here is what you'll need: 
2.5 cups of unbleached all purpose flour, 4 tablespoons of sugar, half a teaspoon of salt, 1 cup of unsalted butter, and 6 tablespoons of ice cold water (I like to sprinkle some cinnamon in it if it's for a fruit pie... that's my own little thing)

Begin by cutting the butter into small squares. Place them in the freezer as you get your other ingredients together. You want your butter COLD!


Put all of your dry ingredients into a bowl and combine. 


Add butter to bowl and toss with a fork to coat all of the pieces. 


Now.... You COULD use a pastry cutter which is perfectly normal and handy. 


But if you've got a stand mixer this is the easiest way to do it. 


Using a paddle attachment on your mixer, combine on low to medium speed until the biggest butter pieces are the size of peas. 


Slowly add the water, one tablespoon at a time until your dough is all stuck together. (And your mixer goes "ker plunk ker plunk") You probably will not need all of the water it depends on the humidity. 


Divide dough in half. Wrap one half in plastic wrap and place in the fridge. I will tell you this dough does the best when rolled right away! So be quick about how you do this! 


Place the other half on a sheet of LIGHTLY floured parchment paper and form into a disk. 


Next, place another piece of parchment paper on top of the dough. (I learned this trick from Pioneer Woman) 


Roll out your dough! 


Roll it out to a 12 inch circle. 


Very gently, remove the top piece of parchment paper. 


Place on top of your pie pan to get an idea of how to center it. 


Swiftly, flip it over and gently remove the parchment paper. Press into the dish. Trim the edges then place in the fridge. 


Prepare your filling and roll out your top crust. 


Dump in your filling and place your top crust on in the same fashion as the bottom crust and seal the edges. Make some slits in it. (I like to sprinkle sugar on top for extra sweetness)


Bake at 425 for 45 minutes. Place foil around the edges for the first 30 minutes. 


Like I said before, the crust is a little different. It's a bit thicker and will almost remind you of a shortbread cookie. It's so yummy though! 


I would show you a pice of the pie once cut, but I'm taking this to our church home group tonight! 

Anyways, pies are yummy and always a crowd pleaser. I love making them! Hope you'll try this! 


Flaky Pastry Dough
Williams Sonoma Baking Book

2.5 cups of unbleached, all purpose flour
2 TB sugar
1/2 tsp salt
1 cup cold, unsalted butter, cut into small cubes
6 tablespoons of ice water

Fit mixer with paddle attachment if using. Combine the dry ingredients. Add butter and toss with a fork to coat. Mix on medium low until the butter pieces resemble small peas. Or cut in the butter with a pastry cutter. Add the water slowly until the dough pulls together. 

This dough should be rolled right away for best results! 

Wednesday, September 7, 2011

what a month

As I was laying in bed tonight my brain began to wander. Got lots on the mind.... I still need to get a birthday card for Blake (who's birthday is tomorrow), I never laminated my seating charts today like I planned on, I never turned off the laminator so I hope someone did, I really like my new Wednesday night bible class, I've gained too much weight, my tea burned my tongue. Anyways.... I decided to get up.

I still can't believe it's September. So much has happened to me in the past month. We moved, I quit my job, found a new one, and started it, we've found a church home and we've got new furniture being delivered in a couple of weeks! Lots of changes. Lots of big changes....

Ok the furniture not so much... although I can't stop dreaming about how this will be our dinning table where we eat our holiday meals years and years to come... and where we'll eat with kids we might some day have.... and where I'll serve many new dishes I learn to make. Where I'll host Sunday dinners for other church members.... can you tell I'm a dreamer?

Anyways with all of this change, I've been able to accomplish the one goal I made for the new year that I didn't think I'd actually find. It was PEACE. My goal was to find peace with myself. That is exactly what I've done this past month. Even though I might not be at peace with my weight and my ability to maintain goals.... I'm at peace with my relationship with God and I'm at peace with my inner being. I'm at peace with the fact that I'm not a children's minister, and that I'm in a job that isn't centered around my degree. It was only through all of my struggles that I was able to find peace. God sure does work in mysterious ways.

One thing I do know is that God is awesome. My God has given me the ability to dream  I dream of everything I want to be- of who God might want me to be. One of my favorite things to do is to just sit and think.... not do anything but think. It's my thinking that's brought me to where I am today. My wild brain... overly emotional, sensitive thinking. God knows exactly what I need. I thank Him for the changes he's given me this past month, and I'm thankful for the peace he's brought my way.


Tuesday, September 6, 2011

Photo Cooking Tutorial: Beef and Pepper Stir Fry

I want to share with you one of the first meals I made for Blake when we got married. I've made this dish many times and it's always a hit! Beef and Pepper Stir Fry! This can serve 2-4 people. It just depends on how hungry you are and what you are eating it with! 

Here is what you'll need! 
cornstarch, sherry or beef broth, soy sauce, garlic, crushed red pepper, 1 lb top sirloin, oil, green and red pepper


The first thing you need to do is measure out all ingredients. Things happen fast with stir fry! 

Chop the tops and bottoms off of the peppers. 


Next chop them vertically and rip out the innards. 


Chop into thin strips. 


Chop beef into thin strips. 


Mix half of the cornstarch, sherry, and soy sauce. Then add red pepper flakes and garlic. (*Go easy on the red pepper if you don't like the heat... it gets hot!)


Use your hands to add the meat, and rub the mixture all over the meat. 


In another bowl or cup, mix a half cup of water with the remaining sherry, soy sauce, and corn starch. 


Next heat 1 tablespoon of oil in a large skillet on medium high heat. Don't use olive oil because it can't handle medium high heat. Use something like safflower or canola. 


Cook the peppers for about a minute or so. They should be crisp tender. Remove to a plate. 


Add half of the beef and cook for about a minute on each side. 


Add to the plate of peppers. Cook the remaining meat. 


Add the peppers and meat to the pan. Then give the liquid mixture you made another whisk and add to the pan. Let it get to a boil and cook for a couple minutes to thicken. 


Serve with rice or Chow mien noodles. 


Now I must be honest..... this was my first time to not serve it with rice and Blake wasn't very thrilled. I can agree with him... it's much better with rice!


Here is the recipe!

Beef and Pepper Stir Fry
Taste of Home: The Complete Guide to Country Cooking 


2 TB cornstarch, divided
4 TB sherry or beef broth, divided
4 TB soy sauce, divided
1 garlic glove, minced
1/2 to 1 tsp. crushed red pepper flakes
1 pound top sirloin, thinly sliced
1/2 cup water
3 TB oil, divided
1 green bell pepper, cut into strips
1 red bell pepper, cut into strips
Chor mein noodles or hot cooked rice

In a medium bowl, combine 1 TB cornstarch, 2 TB sherry, 2 TB soy sauce, garlic and red pepper flakes. Add beef and toss to coat. Set aside.

In a small bowl, combine water with remaining cornstarch, sherry and soy sauce. Set aside.

In a wok or skillet, heat 1 TB oil over medium-high. Add peppers, stir fry for 1 minute or until crisp tender. Remove to a plate.

Add remaining oil and add half of the meat; stir fry until no longer pink. (About 2 minutes) Remove to the plate and cook the remaining meat.

Add the peppers and meat back to the skillet. Stir the cornstarch mixture and add to the pan. Bring to a boil. Stir constantly until thickened. Cook one minute longer. Serve immediately over chow mean noodles or rice.

Saturday, September 3, 2011

Well folks.... here is the deal. I should not blog about my goals.... it clearly brings me bad luck and does not not work for me mentally. I was doing wonderful with my goal before I shared it with people. Something about sharing goals with people puts pressure on me.... and when I face pressure I just back away. For example... in high school... and in college.... when finals rolled around.... I didn't study.... because I felt too pressured. When I feel pressured I simply walk away. It's not a trait I'm particularly proud of.... it's just something I've noticed about myself and I'm learning to deal with. So I'm not going to add pressure onto my health goals... because it doesn't give me the results I want.

Basically I only exercised 20 min on Thursday... I didn't do it yesterday... and today it didn't happen. This is what happens when I tell people about my goals. I do much better when I keep my mouth shut.

So I won't be sharing my goals anymore... it simply doesn't help! I just share with you my results.... which will hopefully be good!


Tuesday, August 30, 2011

goals

Well I've made a goal this week. To walk for one hour every evening this week. (On the treadmill of course) I love that our fitness room has individual TVs (with cable) attached to every machine. So far, I've made it 3 days. I hope that next week I will be able to tell you that I did it every day! I've also been trying to drink a cup of tea every evening.... which is super easy to do when I've got my yummy orange cinnamon tea from Seattle.... I might have to order some more!

Next week I'm going to add another goal into my life. Oatmeal for breakfast! That's a hard one for me! I love breakfast food.... LOVE LOVE LOVE it! And I love it for breakfast time the best :) It is my favorite meal to eat of the day.... when I wake up breakfast is what gets me out of bed. I've got some amazing oatmeal though that has dried apples and flax seed and is just really yummy and I need to eat it up. So next week that's my goal... and trust me I don't plan to keep that one forever but I would like to get in the habit of eating healthier breakfast.... rather than an indulgent one.

So hopefully next week I can tell you that my one hour walk go is going well and that I've started my oatmeal goal strong.

Goals are good.... they give me focus. I've never been that great at keeping them. I figure if I make them short term, realistic, and have accountability I'll succeed!

That's what's going on with me!


Sunday, August 28, 2011

let nothing move you

"Therefore, my dear brothers, stand firm. Let nothing move you. Always give yourselves fully to the work of the Lord, because you know that your labor in the Lord is not in vain."
~1 Corinthians 15:58~

I love the book of 1 Corinthians. Paul wrote this book to encourage and guide a group of Christians. When I think of the persecution and mixed messages that Christians must have been faced with during that time I feel so lucky to live in the bible belt of the good ol' United States of America.

It's these letters that truly help us to see the product of Christ's teaching and if we truly study them they can offer us so much guidance.

I find so much beauty and comfort in this verse. "Stand firm. Let nothing move you." Those are powerful words. Stand firm in our faith, our happiness, our hope, our light.... stand firm in everything that sets us apart from those who do not know Christ.

Others devote their labor to themselves and to their families. There are also many non Christians who do great things for other people..... consider Ellen Degenerous. (or however you spell her name) She isn't a Christian and yet she does amazing things for people and stands for many good causes and preaches that people shouldn't bully each other in school. When I see non christians who do so many nice things for people it makes me realize, that as Christians we've constantly got to be stepping up our game. We all want Christians to be respected, to have a reputation for being giving, and loving.

Lately it seems that the media portrays Christians to be judgmental and anything but loving. I say this not to be "Negative Nancy", but to be honest. We've got to continually up our game to show others the type of Christian that Christ calls us to be.

So let's remember to stand firm in Christ and let nothing move us. We should devote ourselves to accomplishing great things for the kingdom. Doing so will bring our Lord much glory. That sort of work is not in vain.


Monday, August 22, 2011

Photo Tutorial: Oven- Baked Chicken Tenders


I realize that I'm not the next greatest food blogger, and that's fine... I really do not have that ambition. I enjoy taking pictures of my cooking process because it's fun and relaxing and there is a lot of beauty in food. One day, I hope to have kids of my own and I want to be able to pass the joy of cooking down to them. I've learned to cook by using photo tutorials and recipes that include step by step pictures. My idea is that one day I'll have a good collection of photo led recipes for my children when they get older so that they will learn to make the recipes of their childhood.

In honor of childhood I want to share one of my favorite treats to make- oven fried chicken fingers!


Preheat the oven to 425 degrees. Brush 1/4th cup of olive oil on a rimmed baking sheet. See all of the brown on the pan.... these chicken fingers have created those marks.... I'm just preparing you for it!


Take 3 chicken breasts and cut each into 4 strips. (Note... I only used 2)


You'll need 3 shallow bowls. Add 1/2 cup flour to one bowl, 4 egg whites to another, and 1 cup of bread crumbs to another. Easy peasy folks!


To each bowl add 1 teaspoon of kosher salt and a few cracks of pepper


To the breadcrumbs add 1/2 cup of freshly shredded or grated Parmesan cheese. Then add 2 teaspoons of your favorite herb seasoning mix. (Another alternative is 1 teaspoon of freshly chopped parsley and 1 teaspoon of thyme) Mix up the ingredients in all 3 bowls.


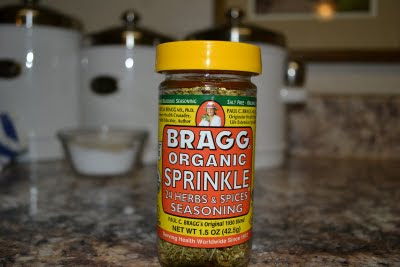
This is my favorite seasoning. My parents introduced me to it. I don't know where it's sold other than Whole Foods.... hopefully the OKC Whole Foods will open before this bottle runs out! I love this stuff!


One by one.... dip a strip in the flour...coat well... shake off excess... then coat with egg mixture... then roll in the bread crumb mixture. Place on pan.... do this with all of the strips. (I didn't take pictures of each step because it was almost 7 and I was getting a little speedy)

ALSO! At this point you can put them in the fridge uncovered for a few hours and it will actually make the crust crispier... I didn't do it this time though.

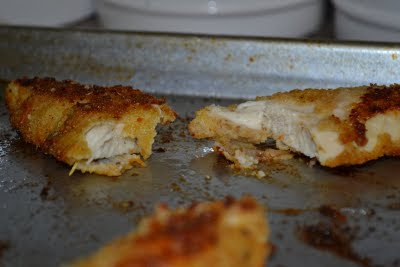
Bake for 8 minutes. Then flip each strip and cook 10 minutes longer. Be sure to cut into the largest strip to make sure there is no pink!

These are real easy to make but do involve some love and anyone you make them for will enjoy them! Also... if you have kids it seems like this could be fun to make with them.... let them get the dirty fingers instead of you!

Here is the quick recipe:

Oven-Baked Chicken Fingers from Williams-Sonoma's Family Meals Cookbook

Ingredients:
1/4 cup olive oil
1/2 cup all purpose flour
4 large egg whites, lightly beaten
1 cup plain bred crumbs
kosher salt and fresh ground pepper
1/2 cup freshly grated or shredded Parmesan
1 teaspoon fresh thyme & 1 tablespoon of chopped fresh parsley (OR 2 teaspoons of your favorite herb seasoning)
3 boneless, skinless chicken breast halves, each cut into 4 strips

Process:
1. Preheat oven to 425. Pour the oil into a rimmed baking sheet.

2. Place the flour, egg whites, and bread crumbs into 3 separate bowls. Line them up in that order. Season each bowl with 1 teaspoon of salt and a few grinds of pepper. Stir the Parmesan and herbs into the bread crumbs.

3. One at a time, dip the chicken pieces into the flour and tap off the excess, and then dip them into the egg whites and allow the excess to drip off. Finally, roll in the bread crumbs and place on the prepared pan, spacing them 1-2 inches apart. (At this point the chicken can be refrigerated, uncovered, for a few hours. The coating will dry out a bit and will crisp better in the oven)

4. Bake for 8 minutes. Turn the pieces over and continue to bake until golden and opaque thought, 8-10 minutes longer. Serve right away!

Serves 4-6