Wednesday, May 15, 2013

Easy All-Natural Strawberry Jam


Strawberries are everywhere right now... cheap and delicious. I've been making this succulent strawberry jam on a weekly basis since moving to Houston. I thought it would be fun to share the recipe I use with anyone interested. It would be a super fun activity to do with the kids in your life! I bet they would love to decorate some labels for the jars too!

I'm particularly in love with this recipe because of it's simplicity. It doesn't call for artificial pectin, but instead uses the natural pectin found in apples to jell the fruit. I think the apple adds a yummy twist to the jam as well.

Also, it uses a very basic method of "processing" the jars which means you don't need to invest in a large canner or many other canning supplies to make this recipe. This recipe comes from a Williams-Sonoma cookbook, so I trust it to be safe. (Note: It is not safe to make changes to canning recipes. Professionals out there test them to make sure they are safe. Always use canning recipes from a trusted source.)


Here are the only "tools" you'll need to make this jam: 
- Kitchen Scale- Weighing ingredients will ensure the success of yours jam.
- Grater 
- 4-5 half-pint canning jars with self-sealing lids that have never been used and metal bands 
 * Make sure to use clean jars. Hand wash them in warm soapy water, or run them through the dish- washer. Do not put lids in the dish-washer. 
- Canning Jar Funnel- This is optional, but makes the job much easier. Find them at Wal-Mart. 


Ingredients: 
two pounds of strawberries 
Weigh berries after they have been washed, hulled, and sliced. 
one and one half  pound of sugar 
1 green apple - Skin and Flesh grated, but no core
One forth cup fresh lemon juice -  free of seeds


Let your kids help you prepare your ingredients! They can pull the leafy parts off the berries and slice them with butter knifes. Let them help you measure. Teach them about cooking, math, and opposite flavors! (Strawberries are sweet, green apples are sour) 
Let them be amazed as they watch the mixture transform! 


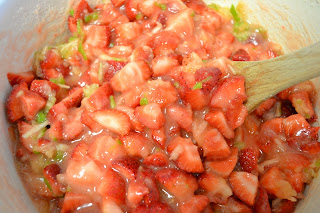
Combine all ingredients in a nonreactive 5 qt. heavy bottom sauce pan or pot. 
(I like to use my dutch oven.) Use a wooden spoon as you go on with your jam.


Bring it to a heavy boil over medium heat. (A simmer doesn't count!) Stir often and remove pink foam that rises to the top. It takes about 25 minutes for mine to get to a heavy boil. Depends on how fast your stove it! 


This is a nice heavy boil. It's what your looking for! Listen as the bubbles change from boiling bubbles to plopping bubbles. Let it boil for about 15 minutes. It smells so wonderful! Embrace the strawberry sauna and stir constantly


This is looking wonderful. The color is dark and rich and the jam is very thick. 


Test your jam on a chilled plate. If juices run from the jam when the plate is tilted, as shown below... then you need to wait another 5 minutes to test it. 


This is how your jam should be. It will go down when tilted, but it all stays together. It's ready now! 


Ladle the jam into the jars one at a time, leaving about a half inch of space. As soon as you get the jam in the jar, wipe the rim with a damp cloth if needed, top it with the lid, and screw on the band. Turn the jar upside down. The scalding hot jam will seal the lid. 
Repeat until your jars are full. 


 Let your jars sit upside down until they are completely cool. Then turn the jars right side up and press each lid in the middle. If the lid stays depressed (firm and doesn't pop when pressed), then you successfully made a jar of jam! If your lid does pop when pressed, then you need to store it in the fridge and use within two weeks. (This method has never failed me yet.) 

Keep your sealed jars in a dark cook place for up to one year! 


This jam is good for so many things, but my favorite way to eat it is 
on a warm, fresh biscuit! 


From start to finish, it takes me about an hour and a half to make this jam. It's simple and fun, and a great way to use those delicious strawberries we see at the grocery store!
 Enjoy it some time, I think you're gonna love it! 

*Recipe from Maria Helm Sinskey 
Williams-Sonoma Family Meals 

Saturday, May 11, 2013

Simple and Comforting Ghoulash

I haven't done a post like this in a while and it's partly because there are so many people out there doing posts such as these and they put a lot more time into it and produce a much better product. But it's just fun... and today as I was cooking I thought to myself, "Why not?!" So anyways... I hope you enjoy!!


It's not very fancy or frilly, but I love ground beef. (Good quality beef I should add... have you seen how some of that stuff is produced?! Watch "Food INC" on Netflix!)  It's so economically friendly and let's face it... it can make a pretty cozy meal. A lot of times 1 pound of ground beef doesn't go very far. Let me re-phrase that. If you like to have a good portion of meat, it seems that 1 pound of ground beef doesn't go very far. Somehow this dish defies all odds and it magically turns into the massive meal that is so incredibly meaty. I don't get it. All I know... is that when we are a few days away from the next pay check and I'm trying to stick to the budget, this is what I turn to. American Ghoulash. 


Here are the basics: 1 lb good quality ground beef, half pound of elbow noodles, onion, garlic, tomato paste, diced tomatoes, parmesan, and red chili flakes (optional)


First get a large pot of boiling water. Add the salt and noodles. Cook al dente because nobody likes soggy noodles! It should only take about 5 minutes. (Be sure to salt the water, because this is how this dish gets it's flavor!) 


Meanwhile, chop up your onion and a couple cloves of garlic. Try not to cry. 


Oh, look! The pasta is cooked! Drain and reserve some of the pasta water. (About one third cup.)


Brown the meat and onion in a large pot or dutch oven over medium high heat. I add salt and pepper to the meat, but that's optional. Sometimes I'm lazy and I don't.  It's important to wait until the pan is hot before adding the meat, other wise the meat doesn't brown good and it'll be gray. You can also brush some olive oil on the bottom of the pan to add some flavor and help it brown well.


Now... don't go waisting a colander. Angle the pan so all the juice runs to one side and dab it up with a couple of paper towels. So much easier that way. 
You could just leave it in there too... that never hurt anyone. 


Add the garlic and tomato paste. It's important when using tomato paste to add it before your liquids. When you stir it around in the hot pan, you release the flavors a lot better. So mix it all up and wait for it to be really fragrant. 


In come the diced tomatoes. 


 And some red chili flakes. I add just shy of a tablespoon because we really like the heat. But you certainly don't have to put it in there if you don't like spice. Or you could put less. Or more if you really want to clear your sinuses. If the onion didn't do it earlier. 


I really LOVE Bragg Organic Sprinkle 24 Herbs and Spices Seasoning. I like to put some of this in when I've got it. Or sometimes I add rosemary. The beauty of this recipe is that you really don't need any of it. But if you want to... go for it... it'll be good! 


At this point it's almost done. I usually just let it simmer as I fix whatever sides we are having. But sometimes we don't have sides. And then I just move on. 


OK. Sides are done. Add the noodles and reserved pasta water. Stir it around. Be amazed at how much food it is for one pound of meat. 


Add some parmesan. Shredded or grated it doesn't matter. Stir it all in. 


Heaven is what this is. 


Serve it up with something green and some bread. 

There is just two of us so we never ever finish a loaf of sandwich bread. I usually brush olive oil on leftover sandwich bread and sprinkle it with seasonings and parm cheese and toast it at 400 degrees for 10- 15 min. 

One of our favorite ways to eat this is as leftovers. We put it in a big bowl... top with cheddar cheese.... on the couch... with a good movie. We seriously get like 4 huge meals out of this. This is what we had leftover... it filled a 2.5 qt corning ware dish. 
(And I should add that we were starving because we didn't have lunch today.)


It's so delicious. So easy. So affordable. I always keep the ingredients on hand for a quick solution to being at the end of the grocery budget or being short on time. I've made this in 15 minutes many times.  And it's one of Blake's favorite meals, so that's a huge comfort to know I can make something so simple and please him. 

Make it sometime. I think you're gonna love it. 

Ghoulash

Half pound of elbow noodles
Drizzle of Olive Oil (optional) 
1 lb ground beef
1 onion, diced
2 cloves garlic, minced
2 TB tomato paste
1, 28 ounce can diced tomatoes
1 tsp red chili flakes (I use a tablespoon)
3 TB Parmesan Cheese

1. Cook pasta according to directions, reserving about 1/3 cup of the pasta water. 

2. Heat a large pot or dutch oven and add oil if using. Brown beef and onion together. (Add Salt and Pepper to taste.) Dab fat out with paper towels if desired. 

3. Add tomato paste and garlic. Stir around until well mixed and fragrant. 

4. Add chili flakes and any other spices you wish. 

5. Add noodles and cheese and mix well. 

Serve with something green and crusty bread or toast. Or serve as a one dish meal in a big bowl and hearty appetite. 

Friday, May 10, 2013

What's next?

I suppose it was last fall when my dear friend Doris introduced me to Karen Kingsbury's Redemption Series. I'm not exactly an avid reader so it took me some time to actually get started, but once I did I had those 5 books read within no time. (I've yet to start the next part of that series! But I WILL read them!)

Anyways, there is pretty common verse shared throughout those books.

"For I know the plans I have for you," declares the Lord, "Plans to prosper you and not to harm you, plans to give you hope and a future." ~ Jeremiah 29:11

If you've read the Redemption Series then you were thinking about that verse in your sleep when you were reading those books, because I'm pretty sure it's on every other page! But I love it. I loved reading about the whispers from God to the sweet Baxter family.

I've said this many times, but this is such an interesting time of life. All parts of life are interesting, of course, but this phase just feels so new. When you're in those first fews years after college, and you're watching how life if turning out for you and your friends. There are people who changed paths completely, others faced some bumps in the road that caused things to be pushed back, some are exactly where you'd always expected them to be. (Most) Everyone has grown and matured and have a different air to them than when you first met them.

The thing that I think almost all of us are facing is, "What's next?" Some have a career but have yet to find a soul to spend the rest of their life with. Some have found that soul but have yet to find a career that fills them with joy. (That would be ME!) Some have found neither. Some might be thinking about where they want to move, who and when they want to marry, when they want to buy a house, when they want to have kids, where they want to travel before they do any of that.

If these people I know are anything like me... they think, "What am I going to accomplish?"

Amidst all of these questions I find it so comforting when (thanks to the Baxter family) my mind is often silenced with the words of Jeremiah 29:11. I know I've blogged about this verse at other times, but it's just been such a comfort to me, as it's been for many others.

So we're here in Houston. Blake's got going on his new job, things are all unpacked, and it feels like home. What's next?

I've got no clue.  And that's OK, because someone has that all figured out for me. And that someone has plans that can only be good.

Wishing you many blessings ~